News
Introducing Flyer Safety Lines at Madrid Fly

[the_ad_placement id=”article-above-content-mobile-only”]
We have been watching the construction process of Madrid Fly since last year. As photos of flyers began surfacing we noticed there was something new about the flight chamber. Colored lines at different altitudes had “Class” markings. Curious, we reached out to Alberto Fuertes who is the General Manager of this Spanish wind tunnel. Alberto was happy to give us details and an interview with an in-depth explanation about this new safety concept.
Madrid Fly Safety Line Details
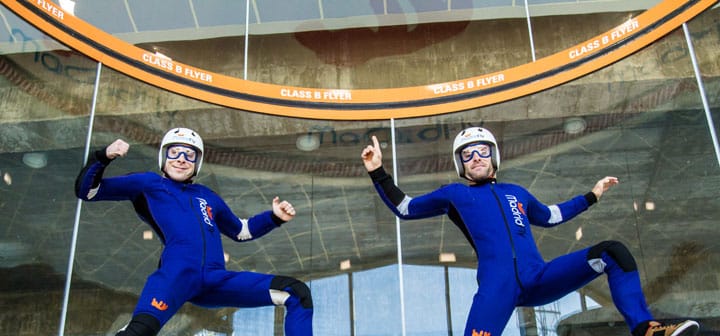
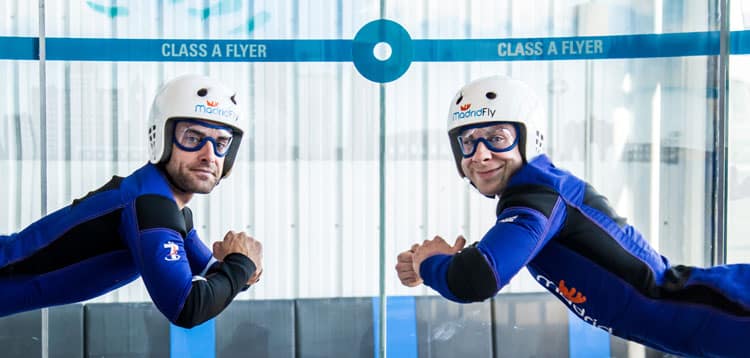
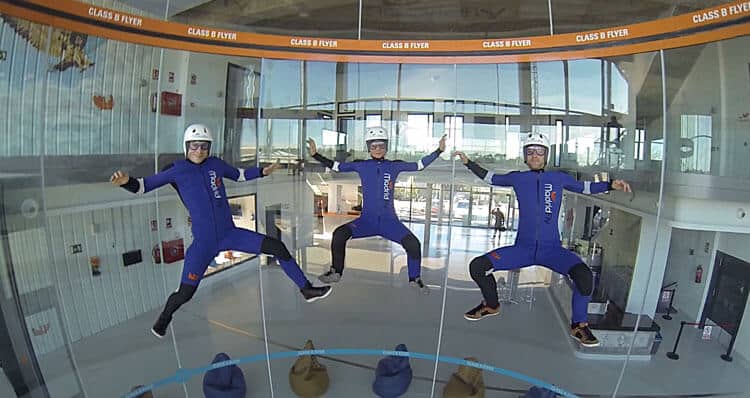
Madrid Fly has included 3 safety marks at increasing altitudes of it’s very tall, glass flight chamber. These lines are simply adhesive tape that make a full circle around the chamber. They are marked with “Class A Flyer”, “Class B Flyer”, and a thick red “Caution” line at the top of the glass. They represent a maximum safe flying height in accordance with flyer skills. The lines give an easy visual reference while flying.
In Madrid, these lines are labeled in accordance with the TunnelInstructor.org terminology. “Class A” and “Class B” refer to flyer skills indicated in the TI.org flyer progression. More information about these classes can be found at the link above by clicking the “Download the Tunnel Book” link. The lines are intended to be respected by all flyers at Madrid Fly including staff, coaches, teams, and pro-flyers.
Begin Interview with Alberto
Why did you create the concept of class lines?
The idea came from a conversation I had with Paul Mayer, co-founder of the Tunnel Instructor Organisation. We were talking about how tunnels are popping up everywhere and how they seem to continuously get “wider and higher”. They also seem to get more and more powerful. A potentially dangerous playground is emerging. The bigger the glass flight chamber, the more spectacular things look, but the easier it also becomes to loose orientation and especially height awareness in there. It made us wonder where the limits would be drawn. Our hope is that it won’t be at the point where nasty incidents start happening. The thought of a power shut-down when people are flying at 18 meters altitude… is horrifying!
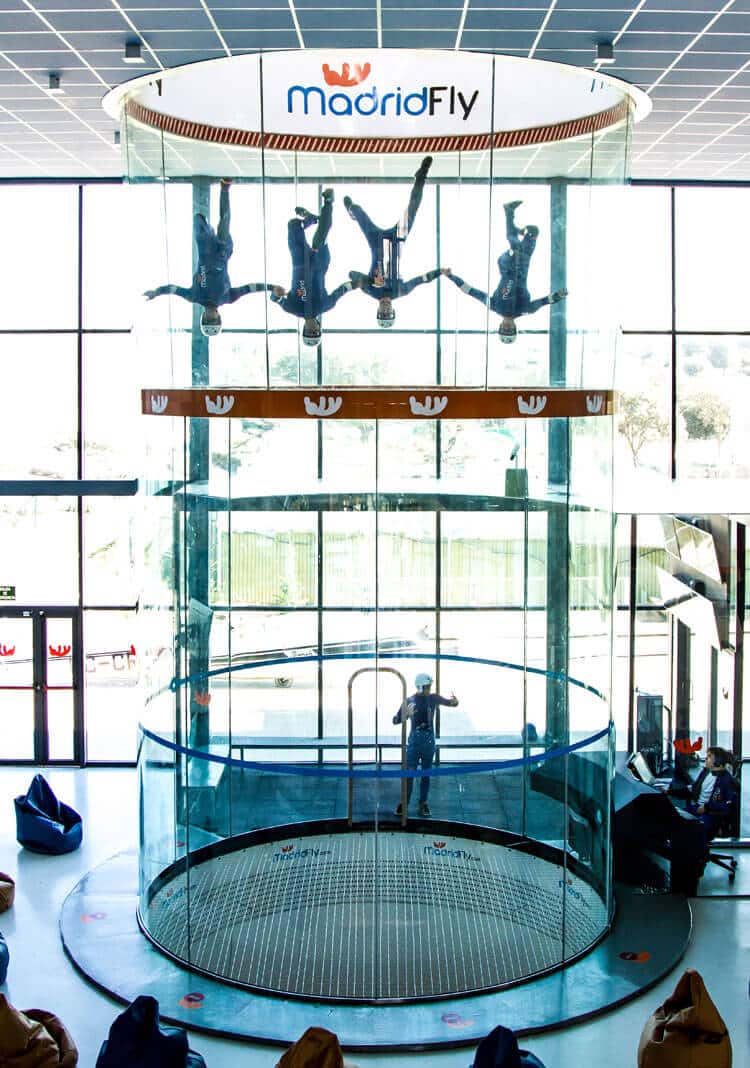
Madrid Fly decided to be proactive and create clear and very straightforward warning signals. This helps flyers easily stick to a recommended safety height according to their skills. The Madrid Fly flight chamber is a beautiful and enormous 18.5 meters high tube. The lower 8 meters are made of glass. It looks absolutely amazing.
We realized that we wanted to give it some extra safety features to avoid potentially dangerous situations. There is no reason first-time flyers should be flying unassisted much above head-height of their instructor. This way, if they get unstable, a spot can be made in a safe manner and nobody will get hurt. This is common sense, of course, but the opposite is unfortunately not an unknown scenario. Also, if for any reason there is a power cut, the wind speed drops quite fast. More advanced flyers will be better prepared recover or bail from a move. Less experienced flyers will lack the same skills. Because of this, we want to keep the less experienced ones closer to bottom net!

Can you explain the lines in more detail?
The general rule is that you may only fly above the lines that correspond to your flyer level. This means first-time flyers or beginners to stay below the line that says ”Class A Flyer”. Once you are a Class A Flyer you may pass the “Class A Flyer” line, but must stay below the “Class B Flyer” line. Once you’re a Class B Flyer, you may pass the “Class B Flyer” line.
Nobody is allowed to fly higher than 8 meters above the net – where the big red “Caution” line is placed. The flyer skills are very well described in the Tunnel Instructor Org Tunnel Book and there are instructional videos available online, for those who want to know more about the terminology used.
Can you define each line?

Class A Line
The lowest line is set at 2 meters and is marked with “Class A Flyer”. Being signed off as a Class A Flyer means that you can fly safely and without assistance both on your belly and your back. It also means that you can perform all belly and back transitions. We want first-timers to stay below this 2 meter line (unless an instructor takes them taxi-flying). This way if the flyer gets unstable, the instructor can safely spot without the risk of anyone getting hurt. Class A Flyers should probably also stay more or less around this altitude when flying. When they train certain up-and-down moves with their coach, they can go as high as the “Class B Flyer” line, but not above. FS teams or belly flyers should stay relatively close to the net as well, so for them it’s a reference line too. More experienced belly flyers will automatically stay low, but maybe some rookie teams or random groups of fun-flyers might need a reminder.
The height of this “Class A Flyer” line coincides with the altitude set by competition standards (according to FAI rules) to perform certain moves. It’s the altitude of “the ring” used to judge dynamic 2-way and 4-way flying. So we included the ring in this line to make it easy for the dynamic flyers to practice their routines and compulsories.

Class B Line
The second line or “Class B Flyer” line is set at 5 meters. Only Class B Flyers are allowed to fly above this altitude. “Class B” means that the flyer can safely perform all static positions (including head up and head down) and dynamic moves on high speed without assistance. The line also applies to taxi-flying for the instructors. New instructors, who are not Class B Flyers yet, can not taxi-fly with the customers above this line. As they gather experience and become rated as stronger flyers with better recovery skills, they can take the customers higher.

Red Caution Line
The third line is set at 8 meters. It’s a big red line, which probably speaks for itself. This is the absolute height restriction and goes for everyone. We also put 32 red LEDs at 9 meters altitude, which are activated by 4 sensors. So a flyer passing this point won’t be in doubt! There is a camera that takes a picture and we’ll send a 100 euros fine to your home address in case you pass this point. :-)
We gave all the lines a different color so it’s easy to keep yourself oriented while flying. The lowest line marks the “safe zone” and we picked a neutral, but easy to see “bright blue”. The second and third lines are orange and red respectively, and you could say they gradually indicate “more danger”. Blue and orange are also the colors of the Madrid Fly logo, so all fits in nicely.
What has the reaction to the safety lines been?
The idea has actually been given really positive feedback. We thought it would be worthwhile to share our initiative through this interview. Experienced flyers and coaches who have visited us so far comment that the lines are super handy. They are clear and easy to use as a reference while composing complicated routines, performing more advanced moves and tricks, or setting up exercises for students. As mentioned before, the lowest line coincides with the competition standards for the judging ring, and the second line also makes for a good set-up reference while flying dynamic routines. Even without the lines, most flyers would probably automatically stick to the indicated altitudes. But they are there for safety reasons, to help the less experienced flyers, and to prevent people from flying recklessly or beyond their skill level.
Of course there is no such thing as a “wind tunnel police” or general tunnel rules and regulations, so we have no intention of trying to make this a standard practice in all the other existing tunnels. But as a Tunnel Instructor Chief Examiner with over 4000 hours of tunnel time, I can guarantee that these simple and easy to install lines will prevent many accidents from happening. I recommend them, especially in big tunnels.
End Interview
We would like to thank Alberto for sharing this idea which has the full support of Indoor Skydiving Source. We appreciate Alberto’s willingness to share this information. We sincerely hope that this information helps bring worldwide attention to the environments that taller, faster wind tunnels are creating. We also applaud the simplicity of this concept. Some guidelines and a set of adhesive tape rings is a simple idea that can be implemented easily.
Since December 2015, Madrid Fly has been in a trial period. During this time Pro-Flyers have been welcome to test the new Spanish technology and enjoy the beautiful facilities. The tunnel will open its doors to the general public beginning in February 2016. For more information about the tunnel, be sure to check out the interview we did with Alberto last year.
Published: February 16, 2016 | Last Updated: December 2, 2021
Don’t miss an update!
Join our mailing list for the latest indoor skydiving updates delivered directly to your inbox.
"*" indicates required fields

