Essential Information
The Complete Indoor Skydiving Gear Guide
[the_ad_placement id=”article-above-content-mobile-only”]
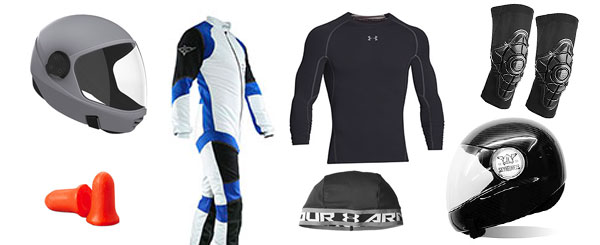
In the world of indoor skydiving, the phrase dress for success makes all the difference. From the early stages of your progression as a tunnel flyer, having the right gear is important. In this article, we are going head to toe (literally) and discussing all the gear you’d possibly need as an indoor skydiver.
Note: this article is not for first-time flyers. The tunnel will provide you with all the gear you need for your first flight. This article is relevant for anyone who is pursuing indoor skydiving as more than a one-and-done bucket list item.
Our Gear Philosophy
Before we dive in, it’s important to understand what we are trying to achieve here. Understanding these fundamentals, you be able to take the equipment suggestions as they are, or experiment with your own choices:
- Use The Right Tool for the Job – The wrong gear (suits are a big one) can slow your learning process way down, and tunnel time is way too expensive to be messing with your gear mid-flight. Investing in the right gear from the get-go will save you money and accelerate your progress in the tunnel. It makes no sense to wait to invest $500 in the equipment you actually need fighting the gear you have only to progress slowly or learn bad habits that you’ll need to spend more money correcting later.
- Protect Your Skin – Long periods of wind exposure and contact with the tunnel is tough on your skin. The flap of your suit can leave you with a rash. Covering exposed skin and wearing a rash guard layer pay off in the long run.
- No Metal – The glass panels that make up a flight chamber aren’t cheap. Smacking into them with a piece of metal is the last thing you want. Leave your steel-toed boots at home. Take off your rings and/or wear gloves. Get rid of metal mounts on your helmet.
- Prioritize Communication – Tinted visors and black gloves on black suits might look cool to you, but nobody else will appreciate them. Save your Darth Vader look for Halloween and do your friends a favor and show them your eyes, mouth and make it easy to read hand signals while you fly.
- The Best Tool is the One You Don’t Notice – All of these pieces of equipment should be considered your tools for the job of flying in the tunnel. When it comes to tools, the best ones are the ones you don’t notice when you use them. When you become one with your equipment, then you’ll have the fastest progression and the best sessions possible.
Note that we are making gear recommendations for climate controlled, high-powered tunnels. If you’re flying in a tunnel exposed to the elements, you’ll need to adjust for the cold/heat. If you’re flying in a low powered tunnel, you’ll need a bit more flap in your life. Adjust accordingly if you fall into one of these less common groups.
Disclaimer: This article includes links to products. Some of these links will provide ISS with a referral commission if you make a purchase through them. This absolutely has not influenced the content in this article by any means.
Table of Contents
Helmet
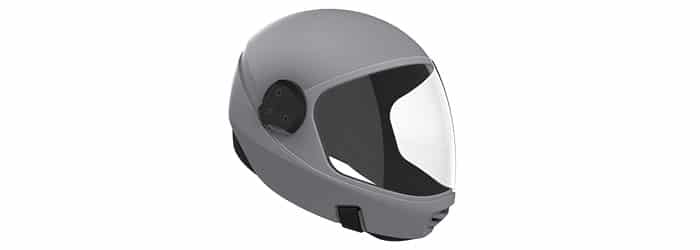
Starting at the top of the body, let’s discuss the benefits of a good full face helmet. This is one of the easiest gear decisions to make and is a great place to start for a number of reasons: A full-face helmet is a universal piece of equipment that can be purchased as early in your tunnel progression as you’d like. The same helmet can be used across any discipline you’ll choose.
A full-face helmet is essential because it offers protection for your face from the tunnel and other flyers. This is invaluable when progressing as it prevents minor bumps and provides a sense of security as you fly. You can even rent a full face for your first flight at many facilities.
Suggested Helmet: Cookie G3
In 2010-2011, Australian company Cookie Composites introduced the helmet that changed the game: the Cookie G2. This helmet was the first to provide a clear view of a flyer’s entire face with a visor that could be easily opened and closed. In 2011 the carbon fiber shelled G2 was replaced by the plastic-shelled G3. This helmet quickly became the standard for indoor and outdoor skydivers.
You simply can’t go wrong with a G3. Cookie dominates the helmet market for good reason – it’s a great product. This helmet used by 90%+ of full face helmet flyers. You can buy a G3 from Amazon.
Suggested Helmet: Skyhelmets
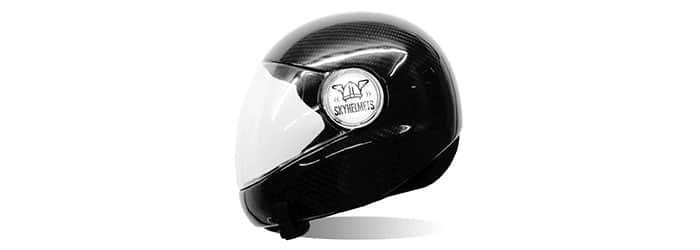
There is a small German company who has developed a product considered by many to best the G3. The company named Skyhelmets has produced a carbon fiber shelled helmet focused on indoor flying. The helmet is being adopted by the top flyers in the world and has a growing presence in Europe.
The reason we didn’t recommend it directly is that the helmets are hard to come by. The company’s website has displayed the same ‘soon’ message for some time. If you’re looking to get one of these helmets, your best bet is contacting the company via Facebook or email which can be found on their website.
Other Options
If you ask around, you’re sure to find happy flyers using a range of other helmets that will get the job done. The reason that we are so strongly recommending the G3 is that it is a solid helmet that is an easy choice to recommend to beginner and experienced flyers. It’s the closest thing to a universal recommendation out there.
With all that being said, you may have a strong preference in another direction or know someone who makes an argument for another company. Our suggestion is to listen, try as many helmets as you can, and make your choice based on that.
Helmet Tips
Remove Metal G3 Sideplates
If you have a nice pair of metal side plates for your G3, you’ll need a pair of plastic ‘tunnel side plates’. These side plates connect your visor to the locking mechanism. If you don’t have a pair, most tunnels usually have a box lying around for you to use.
No Camera Mounts EVER
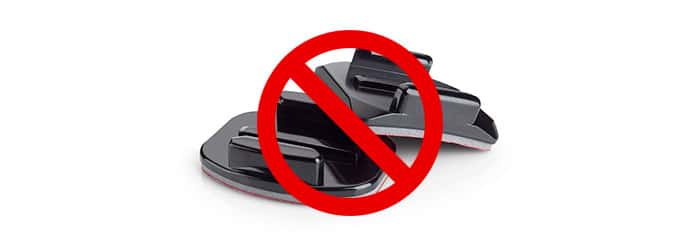
It doesn’t matter if you’re ‘only belly flying’ or ‘not touching the net’, get that camera mount off your helmet. Yes – that includes the small plastic GoPro mount. Stick a butter knife in the top and twist that thing off. Nobody wants to get hit with your camera mount and if it does get stuck in the net, your neck will be the first to pay the price.
Hair Management
Long hair? Listen up. If your hair escapes into the wind during your flight in the tunnel, you will be very bummed. The wind has the ability to knot your hair into a matted mess faster than you’d believe. Managing your hair during your flights is essential. As someone who’s had long hair, here are a few preventative measures that will make your life MUCH easier in the long run.
Hair Ties, Braids, Pony Tails, and Helmet Tucking
You’ve got a couple options with your hair using just a hair tie:
If you can pull off the braid, that is a great option. Make sure your hair is braided tightly and your hair tie is on there securely. You can let the braid fly outside the helmet and you’ll be fine most of the time, especially belly flying. Starting to freefly, your hair may eventually escape.
Using the hair tie, you can also pull your hair into a ponytail. Once it’s in place, flip it on top of your head, and use the helmet to cover it. This method works as long as your helmet is on securely. If your helmet is loose and floats, your hair will escape.
Suggested Method: Skull Cap Helmet Liner
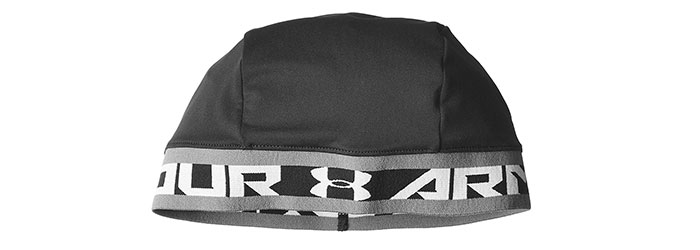
The skull cap is our suggested method of keeping your hair out of the wind. A skull cap is essentially a performance fabric cap with an elastic band. Throw your hair up under this cap, toss your helmet on and you’re good to go. This method is preferred because it doesn’t rely on your helmet being overly tight, your helmet can move without your hair escaping. It’s also a bit more universal than the hood method we mention below.
You can find a variety of skull caps on Amazon. An Under Armor skull cap is a popular choice. The key is to look for something that is thin, breathable, and fits nicely. The elastic needs to sit snugly around your head or your hair will come creeping out.
Rash Guard Hood
We will get into rash guards more below, but know that a rash guard top with a hood is also a great tool for keeping your hair out of the wind. This method probably works a bit better than the skull cap and it also can double as a neck buff. The tricky part is finding the right product that works for you.
Most rash guards don’t have hoods, so you might have to shop around a bit. You’ll want something that has a hood, is the right thickness for you, and is long enough to not become a belly shirt while you fly. This search on Amazon is a good place to start looking.
Ear Protection + Headphones
You get one chance with your hearing. Once it’s gone, it’s gone, so protect it now. Every tunnel you visit will offer ear plugs for your use in the tunnel and these will work perfectly. If you want to take it a step further, here are some suggestions:
- The best foam earplugs are the Howard Leight MAX-1 plugs. They offer the highest noise reduction rating around at NRR33. The large, flanged ends keep them sealed in your ear for your entire session. If you’re in the wind a lot, they are a great investment.
- Custom molded earplugs also work well. You get the benefit of having a single pair of reusable ear plugs with a superior noise rating. The issue is only in price and inconvenience in getting your pair. Though once you have em, you have em.
- Noise blocking headphones are also an option. As flying set to music becomes more and more common, flyers will need to monitor the music while they fly. This should be done very carefully. Generally, headphones will not block as much noise as earplugs, so be careful and do your research. One good option is investing in some in-ear monitors for musicians. It’s also VERY important to note that because of the tunnel noise, your natural tendency will be to crank the music louder and louder. It’s important NOT to do this or you’ll end up blasting your ears. Set the volume outside the tunnel and don’t touch it throughout the session.
Neck Buff
The neck buff is a bit of optional gear that you will find used in a couple of situations: to keep warm or to protect your neck when flying lots of time. Most often you’ll find dynamic flyers using a neck buff to keep their neck from going raw from the wind + rub of the suit collar. If you fit either of these descriptions, pretty much any neck buff will work. Again, there are plenty of options on Amazon.
Hot tip: these buffs have a tendency to fray on the ends in the wind. If you have access to a sewing machine, you can fold each end over and sew a single stitch around the end. This will prevent the buff from fraying into oblivion.
Rash Guards
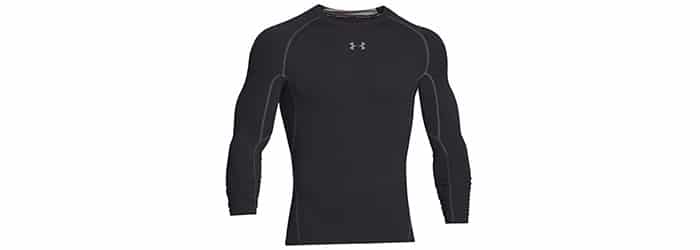
This next section covers the whole body, but at the base layer. A rash guard is a light performance base layer that helps protect the skin from rubbing, chafing and flapping suit wear. These rash guards are normally light, breathable, and compression fitting. Really no matter the discipline, a rash guard is a good idea if you’re going to be spending some time in the wind.
Recommended Rash Guards
You can find a variety of options out there. Both Under Armor HeatGear and Nike Pro Compression are both be great options. Since you’re wearing this as a base layer, you’ll want to make sure the top tucks into the bottoms. Here is an example of what you’re looking for: Under Armour top and Nike bottoms.
Knee & Elbow Pads
Aside from your helmet, the knee and elbow pads are your most essential protective gear. These pads keep your knees and elbows from becoming swollen, sensitive, and generally painful to the touch. Even small bumps to your elbows and knees when flying can be painful. Instructors and coaches who kneel down on to the net should ALWAYS be wearing pads.
In a perfect world, everyone who enters the tunnel should have knee pads on. Elbow pads are optional but are nice to have.
There are also many suit manufacturers out there who will offer to put pads right in your suit. This is something you can pass on because suits move and rarely do the pads sit perfectly. Wearing a good set of knee and elbow pads directly on your skin, beneath your rash guard is the best method.
Recommended Pads: G-Form Knee & Elbow Pads
Similar to the G3 recommendation up in the helmet section, it is easy to recommend G-Form brand pads. They’ve developed lightweight, breathable, highly-protective pads that can be worn all day without issue. They are a fantastic product that you cannot go wrong with. You can find G-Form Knee Pads and Elbow Pads on Amazon.
These knee pads are also great to wear when skydiving. You’ll be much happier kneeling in the plane and packing.
Jumpsuit
Of all the pieces of equipment you’ll need to fly in the tunnel, the jumpsuit is the most expensive, and has the biggest potential impact on your flying. Since we are practicing the sport of bodyflying, what we cover the surface of our body with matters very much. To reiterate a fundamental from our philosophies above, the best suit is the one you don’t notice you’re wearing.
Unlike many of the other gear recommendations, the right jumpsuit is not a one-size-fits-all suggestion. Jumpsuit selection depends on a few important factors including:
- Flying Discipline
- Body Type, Weight, Size
- Experience Level
It is likely that you’ll progress through suits much like a skydiver progresses through different canopies. The one saving grace to all this is that as a beginner student, it’s possible to make some general recommendations. We will start there and then progress into discipline-specific suit types.
Before we get started, here are some things to avoid when choosing an indoor skydiving suit:
- Breathable spandex on static or dynamic suits, especially a full spandex back.
- Handles on a suit used for static or dynamic, especially on the back.
- Two-piece jumpsuits of any kind.
- Suits that are outside your skill level – IE bootie suits for brand new belly flyers, tight dynamic suits for new dynamic flyers.
- Suits not fitted to your body type – IE too baggy or too loose.
Running into one or multiple of these issues can cause situations where the suit is flying you or hinders your learning in some way. Also be sure to watch out because these downsides are often advertised as ‘features’ or are designed for skydiving specific tasks.
As a student, you can take these recommendations here be good-to-go. As you progress as an indoor flyer and begin looking at discipline-specific suits, it’s good to take these suggestions here AND talk with flyers and coaches you respect. You’ll find they have good advice specific to your needs and should be happy to provide some guidance.
Student Suits
As a student, a solid basic suit can go a long way in your initial progression. When you’re first learning to fly in the tunnel – belly, back and even through some beginning static/dynamic.
A student suit with the following characteristics will serve you well:
- A single Cordura-like material consistent throughout the suit.
- Uniform drag throughout the suit – IE not extremely baggy in the arms/legs while tight in the torso.
- A solid zipper that won’t fly open during flight.
- Sized for your body type – tighter on smaller, lighter people and baggier on larger, heavier people.
For new students, you essentially want a very basic dynamic suit.
Belly Suits (RW or Bootie Suits)

Belly flyers, especially competitive flyers, will almost exclusively be wearing a jumpsuit with booties. These booties are made of fabric that stretches from the knee to the toe to create a wing that is used to create lift on the lower part of the flyer. This allows a skilled belly flyer to maneuver quickly and precisely when flying with proper technique. You’ll usually find slicker speed material throughout the torso.
These suits are also often equipped with foam ‘rail-like’ grips on the legs and arms. These grips are used during relative work flying where flyers perform various formations using hand grips. As you progress as a belly flyer, you’ll gain basic control without these booties and then eventually progress to fly with them. Good coaching through this process is essential.
Recommended Belly Suit Companies
Static Freefly Suits

As a static flyer, you’ll be learning to hold various positions. These positions include belly, back flying, sit flying, and head down. The nature of flying in a static position requires you to hang on your arms and legs. Static freefly suits have some special design considerations that help reduce this fatigue and support the flyer.
A static freefly suit will usually be primarily made of a material like Cordura. Cordura is a tough fabric that comes in different weights. Weights are measured by number with higher values being heavier material – common weights are 180, 500, and 1000.
What you’ll find on a static freefly suit is the use of lighter fabrics in the torso, upper arms, and upper legs. You’ll then often find heavier, looser fabrics on the lower legs, and sometimes on the lower arms.This design creates more drag and flap on the arms and legs to help flyers hang the weight of their bodies on their limbs.
This fabric design will also change considerably for smaller and larger people. The smallest flyers may have a generally tight suit with only a small amount of extra leg drag. The largest flyers may have a generally loose suit with lots of heavy, loose material on both the arms and legs.
Recommended Static Freefly Suit Companies
Dynamic Suits
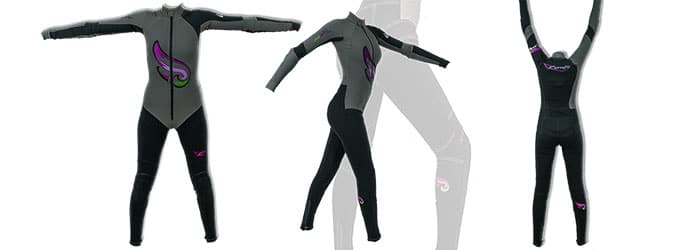
Of all the discipline-specific suits, the dynamic suit most closely corresponds to the student suit approach above. A dynamic suit is designed to provide minimal flap or lift to a flyer. What this does is provides a flyer with the opportunity to fly their bodies without interference.
Where static freefliers hang on their arms and legs, true dynamic flying is the act of flying on a belly and back surfaces through a full range of body angles against the wind. This means that you won’t be hanging on your limbs. By covering your body in a form-fitting layer of fabric, you remove any interference while flying in this dynamic way.
As dynamic flying progressed, so have the suits. Today a high-level dynamic suit is made of a tight Cordura-like fabric with some stretch incorporated. This fabric is applied universally across the body without variation. Often, high-level flyers are looking for the tightest suits possible. There is such thing as a suit that is too tight for a new student, especially if that student is heavier or larger.
Recommended Dynamic Suit Companies
Gloves
Similar to a helmet, investing in a pair of gloves is something you can do at the earliest stages of your tunnel flying career. Protecting your hands is essential as they are often the first thing to come in contact with the wall, net, or other flyers.
When choosing gloves for the tunnel, we are looking for something that is lightweight, durable and does not limit grip. Years ago the skydiving industry adopted gloves used by football receivers as the perfect glove. These gloves transition perfectly over to tunnel flying.
Suggested Indoor Skydiving Gloves
Having tested a wide range of gloves we can confidently say that the Neumann Tackified gloves are the #1 recommendation. These gloves are functional, comfortable, and durable. Unlike other budget gloves, these don’t fail easily and the Velcro at the wrist will last the lifetime of the glove.
The gloves come in white and black. In order to keep your hand signals visible in the tunnel, you should get a color that can be seen against your suit. For example, a black suit with black gloves makes it hard to see a hand signal with your suit as the backdrop or an obvious point or signal while flying.
Shoes
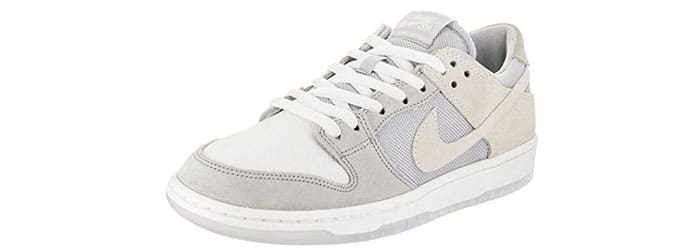
The proper shoe choice can make a big difference in your mobility within the tunnel. Generally speaking, you’ll want to wear a skate-type shoe without overly grippy tread. The idea is that this type of shoe doesn’t catch on the walls and especially the net.
The interwoven cable floor at the bottom of the flight chamber has a tendency to grab on to tread commonly found on running shoes. By wearing flat-soled shoes, you’ll be able to walk on the net without tripping over yourself. Your feet will also slide along the walls rather than catch. This is important for flyers, instructors and coaches alike.
Suggested Shoe Choices
When buying a set of tunnel shoes, you should be looking for a skate shoe that offers some protection without going overboard. Light canvas shoes like converse don’t offer enough protection. A thick high-top basketball shoe is too much and you’ll end up having to drag them around the tunnel.
After years of experimentation, we can confidently say Nike SB Dunk Low’s are the closest thing to a ‘perfect tunnel shoe’. This is specifically because they are a good balance of foot protection without going overly clunky. They also happen to have the toughest shoe sole around – this is a BIG deal because we’ve had shoe soles fall apart from just one session.
This durability is incredibly important as an instructor or coach who is walking on the net all day long. These shoes will last a LONG time compared to any other option out there. If you’re not a coach or instructor, the SB’s are still great and they will last forever. If you’re not into the Nike’s, they are still a great example of what to look for in a good tunnel shoe.
Conclusion
Hopefully, all these suggestions have left you with a clear idea of the gear you need to look and fly like a pro. If you have any questions when making a gear choice, feel free to leave your question in the comments below, or email us. Also be sure to talk to your local flyer base and see what they say. Cross-reference their recommendations with our fundamental gear philosophy at the top and see if it checks out.
Published: April 24, 2018 | Last Updated: October 5, 2022
Don’t miss an update!
Join our mailing list for the latest indoor skydiving updates delivered directly to your inbox.
"*" indicates required fields

